To build a vacuum forming box, assemble a frame, attach a heating element, install a vacuum source, and seal it tightly.
Design Principles for a Vacuum Forming Box
When designing a vacuum forming box, it’s crucial to consider various factors to ensure optimal performance and durability. The design principles focus on creating a functional, efficient, and cost-effective device.
Selecting the Right Materials
- Durability and Heat Resistance: Choose materials that can withstand high temperatures and are durable. ABS plastic and aluminum are popular choices.
- Weight and Portability: Lighter materials like certain plastics can make the box more portable but might sacrifice some durability.
- Cost-Effectiveness: Balance between quality and cost. Aluminum offers longevity but at a higher price, whereas plywood is more budget-friendly.
- ABS plastic – Known for its toughness and heat resistance.
Dimensional Considerations
- Size of the Forming Area: The size should be based on the typical size of objects you plan to form. A standard size might be 12×12 inches for small to medium projects.
- Wall Thickness: Opt for thicker walls for increased durability. A recommended thickness could be around 1/2 inch to ensure stability and heat resistance.
- Vacuum Strength: The size of the box should match the capacity of your vacuum source. A standard shop vac can suffice for smaller boxes.
- Height of the Box: A height of 6-8 inches is usually sufficient for most projects, allowing for adequate space for plastic sheets to heat and stretch.
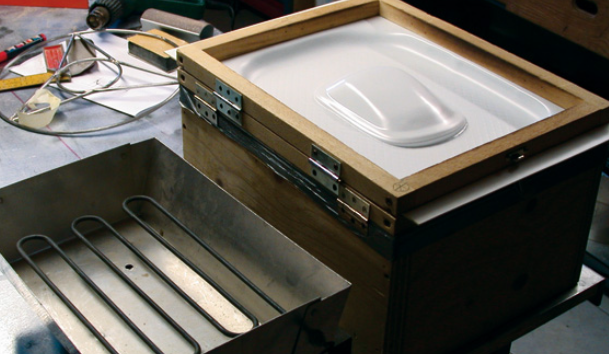
Building the Vacuum Forming Box
Constructing a vacuum forming box involves careful planning and precise execution to ensure functionality and safety. The process includes assembling the box frame, installing the vacuum system, and attaching the heating elements.
Step-by-Step Assembly Instructions
- Prepare the Base and Frame: Cut the chosen material (e.g., plywood or aluminum) to the desired dimensions. For a standard box, a 12×12 inch base works well.
- Assemble the Walls: Attach walls to the base using screws or welding, depending on the material. Ensure the walls are at least 1/2 inch thick for stability.
- Install the Vacuum Port: Cut a hole for the vacuum port. The port should fit the hose of a standard shop vac (Shop Vacuum).
- Create the Seal: Attach a silicone rubber gasket around the top edge to ensure a tight seal with the plastic sheet.
- Install Heating Elements: Mount the heating elements above the forming area. Ensure they distribute heat evenly across the entire surface.
- Attach the Hinged Frame: For holding the plastic sheet, attach a hinged frame on one side of the box. This allows easy placement and removal of the sheets.
Safety Precautions
- Electrical Safety: Use grounded outlets and ensure all electrical connections are secure to prevent shocks.
- Heat Management: Use heat-resistant gloves when operating the machine, as surfaces can get extremely hot.
- Ventilation: Ensure adequate ventilation in the working area to avoid inhaling fumes from heated plastics.
- Fire Safety: Keep a fire extinguisher nearby, especially when working with high-temperature heating elements.
Vacuum System and Seal
The vacuum system and seal are critical components in a vacuum forming box, playing a vital role in the effectiveness and efficiency of the forming process. Proper setup of these elements ensures the best results in molding materials.
Creating an Effective Vacuum
- Choose the Right Vacuum Pump: Select a pump with adequate power to evacuate the air quickly. A pump with a flow rate of at least 3 CFM (cubic feet per minute) is a good starting point.
- Secure Connections: Ensure all connections between the pump, hose, and the box are air-tight. Use high-quality, durable hoses and fittings.
- Vacuum Gauge Installation: Install a vacuum gauge near the box to monitor the vacuum level. This helps in maintaining consistent results.
- Vacuum Pump – Essential for creating a strong and steady vacuum.
Ensuring a Tight Seal
- Use High-Quality Sealing Materials: Silicone rubber gaskets are ideal for creating an air-tight seal.
- Regular Inspection and Maintenance: Check the seal before each use for any signs of wear or damage. Replace if necessary.
- Proper Alignment: Ensure that the frame holding the plastic sheet aligns perfectly with the top edge of the box. Any misalignment can lead to air leaks.
- Clamping Mechanism: Use a strong clamping mechanism to hold the plastic sheet in place. This prevents the sheet from lifting and breaking the seal during the forming process.
Heating Elements for Plastic Molding
Selecting the right heating elements is crucial for efficient plastic molding in a vacuum forming box. The type of heating element and its temperature control capabilities directly impact the quality and efficiency of the molding process.
Types of Heating Elements
- Ceramic Elements: Offer uniform heating and are energy-efficient. Ideal for projects requiring precise temperature control.
- Quartz Infrared Heaters: Provide rapid heating and are suitable for thicker plastic sheets. They are more energy-intensive but offer faster operation.
- Metal Sheathed Tubular Heaters: Known for their durability and are often used in industrial settings. They provide consistent heat but may take longer to reach the desired temperature.
- Halogen Lamps: Offer intense, focused heat and are suitable for quick heating of small areas. Their lifespan is shorter compared to other types.
- Ceramic Heating Elements – Commonly used for their efficiency and uniform heat distribution.
Temperature Control
- Thermostat Integration: Install a thermostat for precise temperature regulation. This ensures that the plastic is heated to the ideal temperature for molding.
- Digital Control Systems: Use digital controllers for more accurate temperature adjustments. They offer the advantage of setting exact temperatures and monitoring changes in real-time.
- Power Rating: Choose heating elements with the appropriate power rating for your setup. For a standard 12×12 inch forming area, elements with a power rating of 600-800 watts are usually sufficient.
- Safety Features: Include safety features like automatic shut-off to prevent overheating. This not only protects the equipment but also ensures user safety.

Molding and Forming Techniques
Effective molding and forming techniques are vital for achieving high-quality results in vacuum forming. Understanding how to manipulate the plastic sheet and the forming process is key to success.
Preparing the Plastic Sheets
- Selection of Plastic Type: Choose the right type of plastic for your project. Common choices include ABS, polystyrene, and acrylic. Consider factors like durability, flexibility, and melting point.
- Cutting to Size: Cut the plastic sheet to fit the frame. For a standard 12×12 inch vacuum forming box, a sheet size of 14×14 inches allows for adequate clamping.
- Removing Protective Film: Remove any protective film from the plastic sheet just before heating to avoid contamination.
- Pre-Heating: Pre-heat thicker sheets for a more uniform temperature distribution. This can be done using a heat gun or in a pre-heating oven.
Tips for Successful Molding
- Even Heating: Ensure the plastic sheet heats evenly to avoid thin spots. Monitor the sagging of the sheet to gauge readiness.
- Timing is Crucial: Once the plastic reaches the optimal temperature, move quickly to form it over the mold. Delay can lead to uneven molding.
- Appropriate Vacuum Strength: Use a vacuum pump that provides enough suction power for the size of your forming box. A standard shop vac usually suffices for small to medium projects.
- Cooling Time: Allow the plastic to cool and solidify before releasing the vacuum. This prevents warping and ensures a crisp mold.
- Mold Release Agents: Apply a mold release agent to the mold for easier separation of the formed plastic.

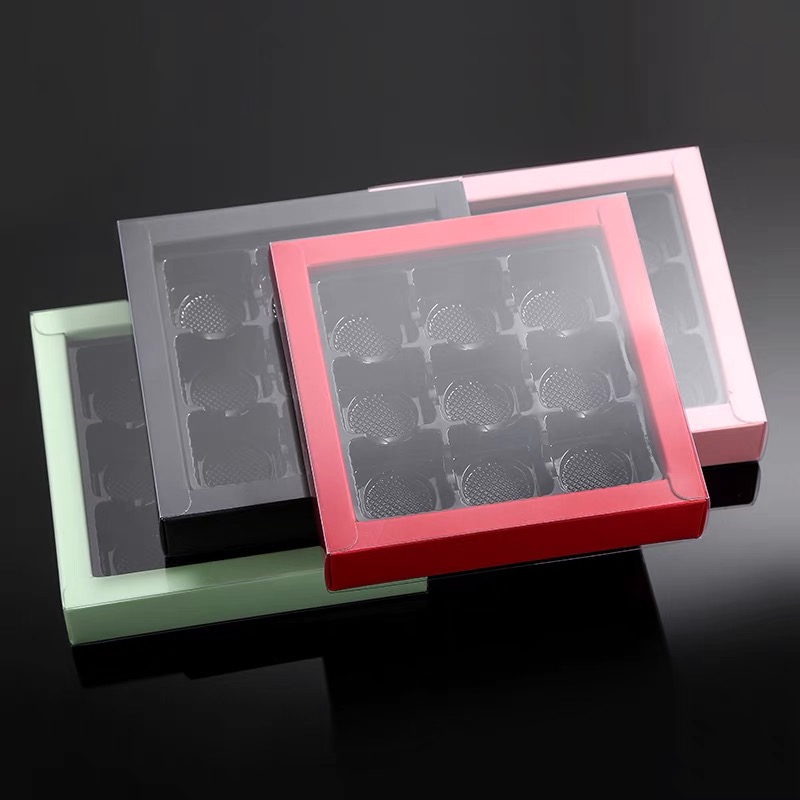
Applications of Vacuum Forming
Vacuum forming is a versatile process used in various industries and crafts, offering numerous possibilities for creative and practical applications. Its ability to mold plastic into diverse shapes makes it suitable for a range of projects.
Industrial and Craft Uses
- Product Packaging: Widely used in packaging for consumer goods, electronics, and food items. Vacuum forming allows for custom packaging designs, enhancing product presentation and protection.
- Automotive Parts: Produces components like dashboards, door panels, and trays. The process is cost-effective for medium-scale production runs.
- Medical Equipment: Used to create durable, sterile casings for medical devices. The process ensures precision and cleanliness, essential in medical applications.
- Theatrical and Movie Props: Ideal for creating lightweight, custom shapes for costumes, masks, and set designs. The flexibility of the process allows for creative freedom in prop design.
- Signage: Produces 3D signs and letters for advertising and branding. Vacuum forming offers a cost-effective way to create durable, eye-catching signage.
Innovative Projects and Ideas
- Custom Hobbyist Creations: Enthusiasts use vacuum forming for model making, cosplay costumes, and RC car bodies, allowing for personalized designs and modifications.
- Architectural Models: Used by architects to create detailed scale models of buildings. The process allows for precise replication of architectural elements.
- Educational Tools: Creates interactive educational models and diagrams, especially in subjects like geography and biology.
- Sustainable Products: Vacuum forming can be used with recycled plastics, contributing to the development of eco-friendly products and packaging.
- Art Installations: Artists utilize vacuum forming for creating unique sculptures and installations, exploring the artistic potential of molded plastic.