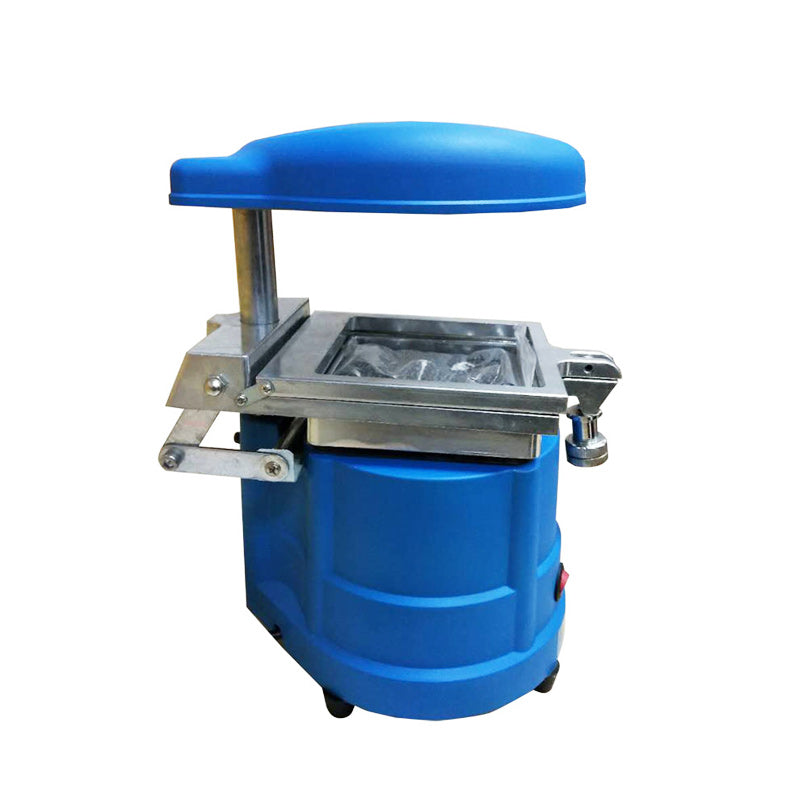
For vacuum forming, you need a heating element, vacuum pump, forming table, and clamping frame.
Basic Components of a Vacuum Forming Machine
Vacuum forming is a popular technique for molding thermoplastics, and the heart of the process lies in the machine. Let’s delve into the primary components of a vacuum forming machine and understand their significance and specifications.
Heating Element
The heating element is essential to soften the plastic sheet, preparing it for molding.
- Type: Most commonly used are infrared heating elements.
- Power: Typical units can range from 2kW to 10kW depending on the machine size.
- Temperature Range: Usually operates between 100°C to 250°C. Precise temperature control is crucial for optimal results.
- Size/Dimensions: Varies, but a standard size might be 1000mm x 1000mm for medium-sized machines.
- Lifespan: Good quality heating elements can last up to 5-7 years with regular maintenance.
- Cost: Prices can range from $500 to $2000, largely depending on size and brand.
More about Heating Elements on Wikipedia
Vacuum Pump
The vacuum pump’s role is to remove air between the mold and the heated plastic sheet, ensuring a tight fit around the mold.
- Type: Rotary vane pumps are most commonly used in vacuum forming.
- Efficiency: Operates at efficiencies of up to 90% in most commercial units.
- Power: 0.5 to 5 HP motors are common.
- Size/Dimensions: Typical dimensions might be 400mm x 300mm x 300mm.
- Lifespan: A high-quality vacuum pump can serve reliably for up to 10 years.
- Cost: A medium-range vacuum pump can be priced between $1000 to $5000
Forming Table
The forming table provides a surface on which the mold and plastic sheet are placed.
- Material: Often made of aluminum or steel for durability.
- Size/Dimensions: Standard tables might measure 1200mm x 1200mm.
- Quality: Surface flatness and sturdiness are paramount.
- Lifespan: With proper maintenance, can last upwards of 8 years.
- Cost: Depending on the size and material, they might range from $800 to $3000.
Clamping Frame
The clamping frame holds the plastic sheet in place above the mold, ensuring even heating and forming.
- Material: Typically made of durable metals such as stainless steel.
- Size/Dimensions: For a medium-sized machine, it might be 1300mm x 1300mm.
- Speed: Quality clamps can be adjusted quickly, within 10-15 seconds.
- Lifespan: Expected to last 7-9 years if not subjected to undue stress.
- Price: Prices can vary, but a good quality frame might be in the ballpark of $600 to $1500.
Types of Plastic Sheets Used in Vacuum Forming
Choosing the right plastic sheet for vacuum forming is pivotal, as it impacts the final product’s quality, durability, and appearance. Various factors influence this choice, from the application’s requirements to the material’s characteristics. Let’s explore the key types of plastic sheets used in vacuum forming.
Thermoplastics vs. Thermosetting Plastics
Thermoplastics:
- Characteristics: Can be reheated and reshaped multiple times without significant chemical change.
- Advantages: Highly versatile; suitable for repeated molding or reworking.
- Common Examples: Polyethylene, Polypropylene, and Polystyrene.
- Cost: Generally ranges from $2 to $5 per pound, though this varies based on type and quality.
Thermosetting Plastics:
- Characteristics: Once set and cured, cannot be remelted or reformed.
- Advantages: Typically more rigid and heat resistant than thermoplastics.
- Common Examples: Phenolic, Melamine, and Epoxy.
- Cost: Prices can range from $4 to $8 per pound, depending on the resin and additives.
Learn more about Thermoplastics and Thermosetting Plastics on Wikipedia
Popular Materials: ABS, PETG, Polystyrene, and PVC
These are among the most widely used thermoplastics in vacuum forming due to their unique characteristics and broad applicability.

ABS (Acrylonitrile Butadiene Styrene):
- Characteristics: Tough, impact-resistant, and moderately flexible.
- Applications: Automotive parts, toys, and consumer goods.
- Price: Typically priced between $1.50 to $3 per pound.
- Thickness: Commonly available from 0.060 inches to 0.500 inches.
PETG (Polyethylene Terephthalate Glycol):
- Characteristics: Clear, tough, and offers good impact strength.
- Applications: Packaging, medical devices, and displays.
- Price: Ranges from $2.50 to $5 per pound.
- Thickness: Usually found between 0.020 inches to 0.250 inches.
Polystyrene:
- Characteristics: Rigid, brittle, and transparent.
- Applications: Packaging, display cases, and disposable tableware.
- Price: Generally costs between $1 to $2.50 per pound.
- Thickness: Typically varies from 0.020 inches to 0.500 inches.
PVC (Polyvinyl Chloride):
- Characteristics: Strong, lightweight, and resistant to chemicals.
- Applications: Piping, cable insulation, and inflatable structures.
- Price: Prices hover around $1 to $3 per pound.
- Thickness: Commonly found in 0.010 inches to 0.500 inches range.
Read more about these materials on Wikipedia
Material Thickness and Its Implications
Thickness plays a vital role in the vacuum forming process and affects aspects like forming time, detail clarity, and product durability.
- Forming Time: Thicker sheets require more time to heat and form than thinner ones. For instance, a 0.500-inch sheet might need up to 10 minutes, while a 0.020-inch sheet might only require 2 minutes.
- Detail Clarity: Thinner sheets often capture finer details more accurately.
- Durability: Thicker sheets generally provide better structural strength and durability.
- Cost Implications: Naturally, thicker sheets are pricier than their thinner counterparts. For example, a 0.500-inch ABS sheet might cost 50% more than a 0.250-inch ABS sheet.
- Applications: Thicker materials are often chosen for structural components, while thinner sheets are used for packaging or aesthetic parts.
Molds and Tooling for Vacuum Forming
The quality and intricacy of a vacuum-formed product significantly rely on the mold and tooling used. A well-constructed mold ensures precision, efficiency, and repeatability. Let’s dive deep into the intricacies of molds, their types, and other considerations in vacuum forming.
Wooden Molds vs. Aluminum Molds
When it comes to molds, the material choice plays a crucial role in the outcome of the formed plastic parts.
Wooden Molds:
- Characteristics: Typically made from MDF (Medium Density Fiberboard) or hardwoods.
- Advantages: Easier to machine and modify, ideal for prototypes or short runs.
- Lifespan: Can last for up to 500-1000 pulls, depending on the wood type and care.
- Cost: Generally more affordable, ranging from $100 to $500, based on complexity and size.
- Drawbacks: Susceptible to moisture, less durable, and may require regular maintenance.
Aluminum Molds:
- Characteristics: Made from aluminum alloys, offering better thermal conductivity.
- Advantages: Durable, consistent, and allows for higher production runs.
- Lifespan: With proper care, can last for over 10,000 pulls.
- Cost: More expensive, with prices ranging from $1000 to $5000 or more, depending on intricacy and size.
- Drawbacks: Higher initial cost and more time-consuming to modify.
Mold Design and Considerations
Proper mold design ensures a smooth vacuum forming process and high-quality end products.
- Draft Angles: Ensuring slight angles on the mold’s vertical surfaces prevents the plastic from locking onto the mold. A typical draft angle might be between 1° to 5°.
- Texture: A mold’s surface texture can influence the finish of the final product. Smooth molds produce glossy finishes, while rough molds result in matte finishes.
- Undercuts: These are areas where the plastic wraps under the mold and can complicate demolding. Minimizing or eliminating undercuts can simplify the forming process.
- Detail and Depth: Extremely intricate details might not form well, especially with thicker plastics. Maintaining a balance between detail and practicality is key.
Releasing Agents for Easy Demolding
Releasing agents ensure the formed plastic doesn’t stick to the mold, simplifying the demolding process and preventing damage to the product.
- Types: Common releasing agents include silicone sprays, wax, and PTFE-based solutions.
- Application: They are typically sprayed or brushed onto the mold before the vacuum forming process.
- Advantages: Ensures easy removal of the plastic, extends mold life, and reduces the risk of defects.
- Cost: Prices vary based on the agent type but generally range from $10 to $50 per can or bottle.
- Frequency: Some molds might require reapplication after every pull, while others can go for multiple pulls before needing a fresh coat.

Operating Procedures and Safety Measures
Operating a vacuum forming machine demands a precise understanding of its processes and inherent safety concerns. Proper setup, operation, and safety measures can make the difference between a successful production run and potential injuries or machine damage.
Setting Up the Machine
Initiating the vacuum forming process requires a thorough setup of the machine:
- Selecting the Right Plastic Sheet: Based on the application, select the right type and thickness. For instance, ABS with a thickness of 0.250 inches might be chosen for robustness and flexibility.
- Clamping the Plastic Sheet: Ensure the sheet is evenly clamped in the frame to prevent any uneven distribution of heat or material during the forming process.
- Adjusting the Heating Element: Set the correct temperature, usually ranging from 250°F to 350°F, depending on the chosen material. This can be verified from the material’s technical specifications.
- Checking the Vacuum System: Confirm the vacuum pump operates efficiently, ideally pulling a vacuum at 29 inches of mercury (inHg) for optimal forming.
Heating and Forming Process
The crux of vacuum forming lies in the controlled heating and forming:
- Heating: Expose the plastic sheet to the heating element until it reaches its forming temperature. A sheet with a thickness of 0.250 inches might require around 3-5 minutes to heat adequately.
- Monitoring: Watch for the sheet sagging, an indication it’s ready for forming. Excessive sagging can result in thin spots or holes.
- Forming: Activate the vacuum once the plastic is heated. This pulls the plastic over the mold, ensuring it captures the mold’s shape and details.
Deep Dive into the Heating Process on Wikipedia
Cooling and Releasing the Formed Plastic
Post forming, it’s crucial to follow steps that guarantee product integrity:
- Cooling: Allow the plastic to cool and solidify around the mold. This might take anywhere from 5 to 10 minutes based on the material and thickness.
- Demolding: Once adequately cooled, turn off the vacuum and gently remove the newly formed piece from the mold.
- Trimming: Excess material around the formed piece should be trimmed using appropriate tools to achieve the final desired shape.
Safety Equipment and Precautions
Safety cannot be stressed enough when operating machinery:
- Protective Gear: Always wear safety goggles to shield eyes from any potential plastic splinters or debris. Heat-resistant gloves are a must when handling hot plastic or molds.
- Ventilation: Ensure the workspace is well-ventilated. Some plastics release fumes when heated, which can be hazardous if inhaled.
- Emergency Stops: Familiarize yourself with the machine’s emergency stop buttons or switches. In any discrepancy, immediately stop the machine to assess the situation.
- Equipment Maintenance: Regularly inspect and maintain the machine for wear and tear. A well-maintained machine not only functions optimally but is also safer to operate.
- Training: Only trained personnel should operate the machine. An understanding of the machine’s workings, potential hazards, and safety measures is paramount.
Post-Forming Procedures
Once the vacuum forming process is completed, the journey of the formed plastic part isn’t over. Several post-forming procedures are necessary to refine the product and ensure its quality meets the required standards. Let’s delve into these crucial steps:
Trimming and Cutting
After the plastic part has been formed, excess material often remains, which must be removed to achieve the final product shape:
- Tools Utilized: Depending on the material and precision needed, various tools can be employed, such as die-cutters, routers, and even laser cutters.
- Techniques: Rotary tools or CNC machines might be preferred for more intricate designs, ensuring consistent and accurate cuts.
- Waste Management: It’s vital to collect and recycle or dispose of the trimmed waste appropriately. Many companies reclaim this waste, reducing costs and environmental impact.
- Costs: Tooling costs can vary widely based on precision requirements. For instance, a basic manual router might cost $200, while a sophisticated CNC machine can run upwards of $20,000.
Explore more about Trimming Techniques on Wikipedia
Finishing and Polishing
To achieve a refined and professional appearance, finishing and polishing become essential:
- Smoothing Edges: Especially with clear plastics, edges can appear rough or whitened after cutting. Tools like flame polishers or buffing wheels can restore clarity.
- Surface Treatment: Techniques such as sanding, buffing, or even applying a clear coat can enhance the part’s appearance and tactile feel.
- Customization: Post-forming, additional features like logos, graphics, or other branding elements can be added using various methods, including printing or decals.
- Materials Used: Polishing compounds, sanding papers of varying grits, and finishing agents all contribute to achieving the desired finish. Costs for these materials can range from $10 to $100, depending on the quality and quantity needed.
Quality Control and Inspection
Ensuring the finished product meets all quality standards is paramount:
- Visual Inspection: Check for imperfections such as bubbles, thin spots, or inconsistencies in the finish.
- Measurement: Using tools like calipers or coordinate measuring machines, ensure the part’s dimensions align with the specified parameters. Tolerances can vary, but a general industry standard might be ±0.005 inches.
- Functionality Testing: Depending on the part’s application, it might need to undergo functional tests to ensure it performs as expected in its end-use environment.
- Documentation: Maintain detailed records of inspections and any identified issues. This not only aids in continuous improvement but also provides traceability.
- Rejection Rate: An industry benchmark might see a rejection rate of 1-3%. This percentage represents the number of parts that fail to meet the quality criteria and must be reworked or discarded.
Applications and Uses of Vacuum Formed Products
Vacuum forming stands as a popular choice among manufacturing methods due to its versatility, efficiency, and cost-effectiveness. The array of applications for vacuum-formed products spans various industries, showcasing the adaptability of this technique.
Industries Benefiting from Vacuum Forming
The range of sectors that rely on vacuum forming is broad:
- Automotive Industry: From dashboard components to interior liners, vacuum forming ensures that cars come equipped with lightweight and durable parts. Cost savings in this sector can be substantial, with vacuum-formed components often being 20-30% cheaper than traditionally manufactured counterparts.
- Medical Industry: Vacuum-formed parts play a critical role in producing medical device casings, trays, and even components for surgical procedures. The need for sterility and precision here is paramount, and vacuum forming can maintain a product’s integrity while keeping production costs low.
- Retail and Packaging: Everything from blister packaging to point-of-purchase displays in stores often comes from vacuum forming. The speed of production, which can be up to 15% faster than alternative methods, makes it a go-to choice for these high-demand applications.
- Aerospace: Here, the emphasis is on lightweight, durable components. Vacuum forming allows for parts that stand up to rigorous conditions while reducing the weight of aircraft, translating into fuel savings and enhanced performance.
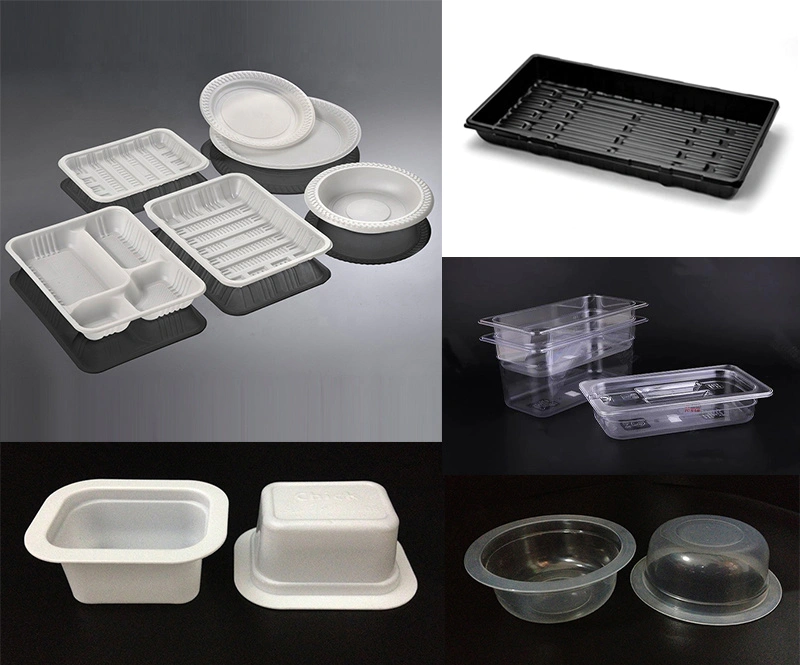
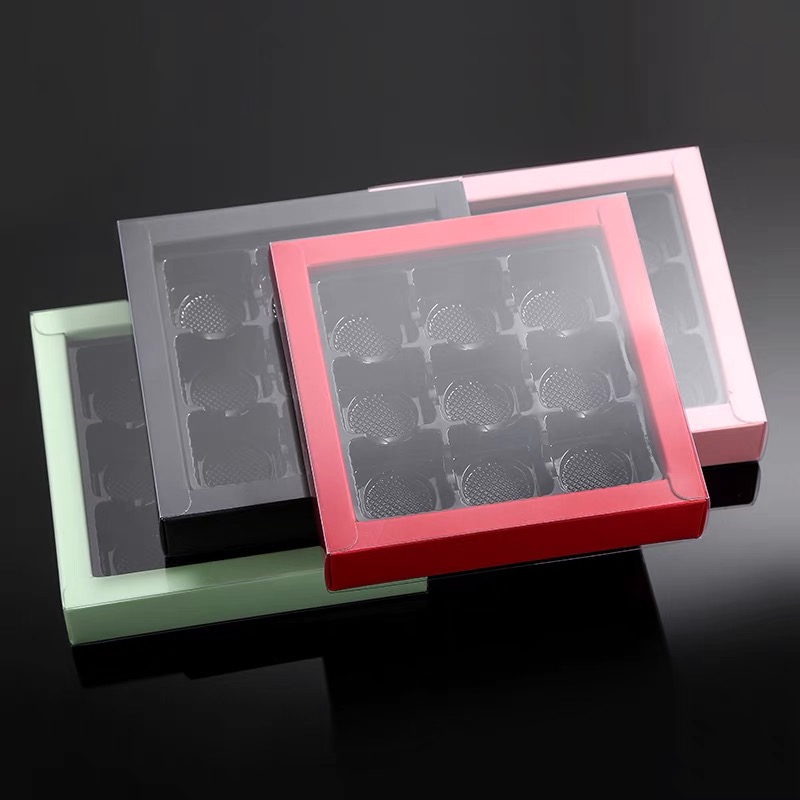
Everyday Products Created through Vacuum Forming
The ubiquity of vacuum-formed products in daily life might surprise many:
- Food Packaging: Those clear plastic containers that hold everything from pastries to salads? Vacuum formed. Their cost-effective production, typically as low as $0.05 per unit for mass production, makes them a staple in food retail.
- Toys: Many plastic components of toys, especially parts with intricate designs, are vacuum formed to ensure detail and durability.
- Home Appliances: The linings inside refrigerators, the plastic casing of vacuum cleaners, and even the drip trays under potted plants benefit from the precise and efficient vacuum forming process.
- Personal Electronics: The plastic casings for devices like headphones, certain phone cases, and more are often crafted through vacuum forming. This process ensures a snug fit and protects the internal components, all while keeping production costs in check.