The six stages of vacuum forming are: design and prototyping, mold creation, plastic sheet heating, shape forming, cooling and solidifying, and trimming and finishing.
Design and Prototyping
Choosing the Right Material
When it comes to vacuum forming, the choice of material plays a pivotal role in determining the efficiency, durability, and overall quality of the finished product. There are a plethora of materials available, but the most commonly used ones are:
- Polyvinyl Chloride (PVC): This material is known for its flexibility, making it suitable for a variety of applications. The average cost is around $15 per square meter.
- Polystyrene (PS): A more rigid material, often used in consumer product packaging. It has an average price of $12 per square meter.
- Acrylonitrile Butadiene Styrene (ABS): Known for its toughness and resistance to impact. Costs can range from $20 to $25 per square meter.
- Polyethylene (PE): This is a versatile material with a moderate level of rigidity. It is priced around $18 per square meter.
Choosing the right material is crucial as it directly influences the product’s lifespan, which can range from 5 to 20 years based on quality and application. Furthermore, the material’s thickness or gauge, usually measured in millimeters, is a vital specification that can vary between 0.25 mm to 6 mm.
Prototype Development and Testing
After selecting the material, the next step is to create a prototype. This initial model helps in understanding how the end product will look and function. Here are the steps involved:
- Design Drafting: Using software like CAD, draft the initial design ensuring dimensions are accurate to within ±0.5 mm.
- Prototype Creation: With the design ready, the next step is to create a scaled-down version using the chosen material. This might take approximately 3-5 hours based on complexity.
- Testing: Once the prototype is ready, it undergoes various tests for speed, durability, and efficiency. For instance, if we’re talking about a container, it might be tested for load-bearing capacity, where it might be expected to withstand pressures of up to 5 kg/cm^2.
- Feedback & Iteration: Gather feedback on the prototype’s performance, aesthetics, and other essential parameters. If the prototype doesn’t meet the desired quality or efficiency standards, the design might undergo tweaks to improve its shortcomings.
Creating the Mold
Types of Molds (Wood, Resin, Metal)
Molds are the backbone of the vacuum forming process. They determine the shape, size, and intricacies of the finished product. The material you choose for the mold largely depends on the specifics of your project, budget, and desired product lifespan.
- Wood: Wooden molds are usually the most cost-effective, with average prices ranging from $50 to $200 based on size and complexity. They’re ideal for short runs and prototypes since they may not withstand the wear and tear of prolonged production cycles. However, they provide a natural touch, making them favored for specific aesthetic applications.
- Resin: Resin molds offer a balance between durability and price. Costing between $150 to $500, they are resistant to temperature fluctuations and can handle more extended production runs than wood. The smooth finish they provide ensures high-quality final products.
- Metal: Usually the most expensive, with costs ranging from $500 to $5,000 based on design intricacy. Metal molds, primarily made of aluminum or steel, are ideal for high-volume production runs due to their longevity and resistance to wear. Their lifespan can exceed 10 years, making them a value for money in long-term projects.
When deciding on the mold type, it’s essential to factor in the expected production volume, budget constraints, and the required durability of the mold.
Preparation and Finishing of Molds
Preparation is paramount. A mold that isn’t well-prepared can lead to defects in the final product, affecting its quality, aesthetics, and functionality.
- Design and Measurement: Start with a precise design of the mold. Measurements should be accurate to within ±0.2 mm to ensure the finished product meets the desired specifications.
- Surface Smoothening: This process ensures the finished product has a smooth, defect-free surface. Sanding, buffing, or polishing might be required, especially for wooden and resin molds. It usually takes 1-2 hours but can vary based on the mold size and material.
- Temperature Regulation: Before initiating the vacuum forming process, the mold must be pre-heated to an optimal temperature, generally around 60°C to 80°C. This pre-heating ensures better material flow and reduces the chances of defects.
- Release Agents: These are applied to make sure the plastic doesn’t stick to the mold. Typical agents might cost around $20 per liter, and a mold might require 10 to 50 ml based on its size.
Heating the Plastic Sheet
Selection of Plastic Type
Selecting the right type of plastic is crucial as it determines the final product’s characteristics, such as strength, flexibility, and transparency. Some popular choices include:
- Polyethylene (PE): Known for its chemical resistance and impact strength. The average cost is around $20 per square meter.
- Polycarbonate (PC): A clear plastic known for its excellent strength and clarity. It’s slightly on the higher end, priced around $40 per square meter.
- Acrylic (PMMA): Popular for its transparency, often used in signage or display units. Its price ranges between $30 to $50 per square meter based on quality and thickness.
- Polypropylene (PP): A versatile material known for its flexibility and resistance to chemicals. Costs average around $25 per square meter.
Each plastic type has its melting point, and the choice should align with the end product’s intended use, lifespan expectations, and, of course, the project’s budget.
Heating Techniques and Temperatures
Once the plastic sheet is chosen, it needs to be heated to a pliable state. The technique and temperature will vary based on the plastic type:
- Infrared Heating: Utilizes infrared lamps that emit radiation to heat the plastic sheet uniformly. This method is energy-efficient, with an average power consumption of around 5 kW for medium-sized operations.
- Quartz Heaters: Provide rapid and uniform heating. They consume more power, around 6-7 kW, but reduce the heating time significantly, often to just 4-6 minutes for a standard-sized plastic sheet.
- Hot Air Ovens: The plastic sheets are placed inside an oven where hot air circulates to heat them. This method can take longer, around 15-20 minutes, and consumes about 6 kW of power, but it’s favored for its uniformity.
Here are the general heating temperatures for popular plastics:

- PE: 130°C to 150°C
- PC: 160°C to 180°C
- PMMA: 160°C to 170°C
- PP: 140°C to 160°C
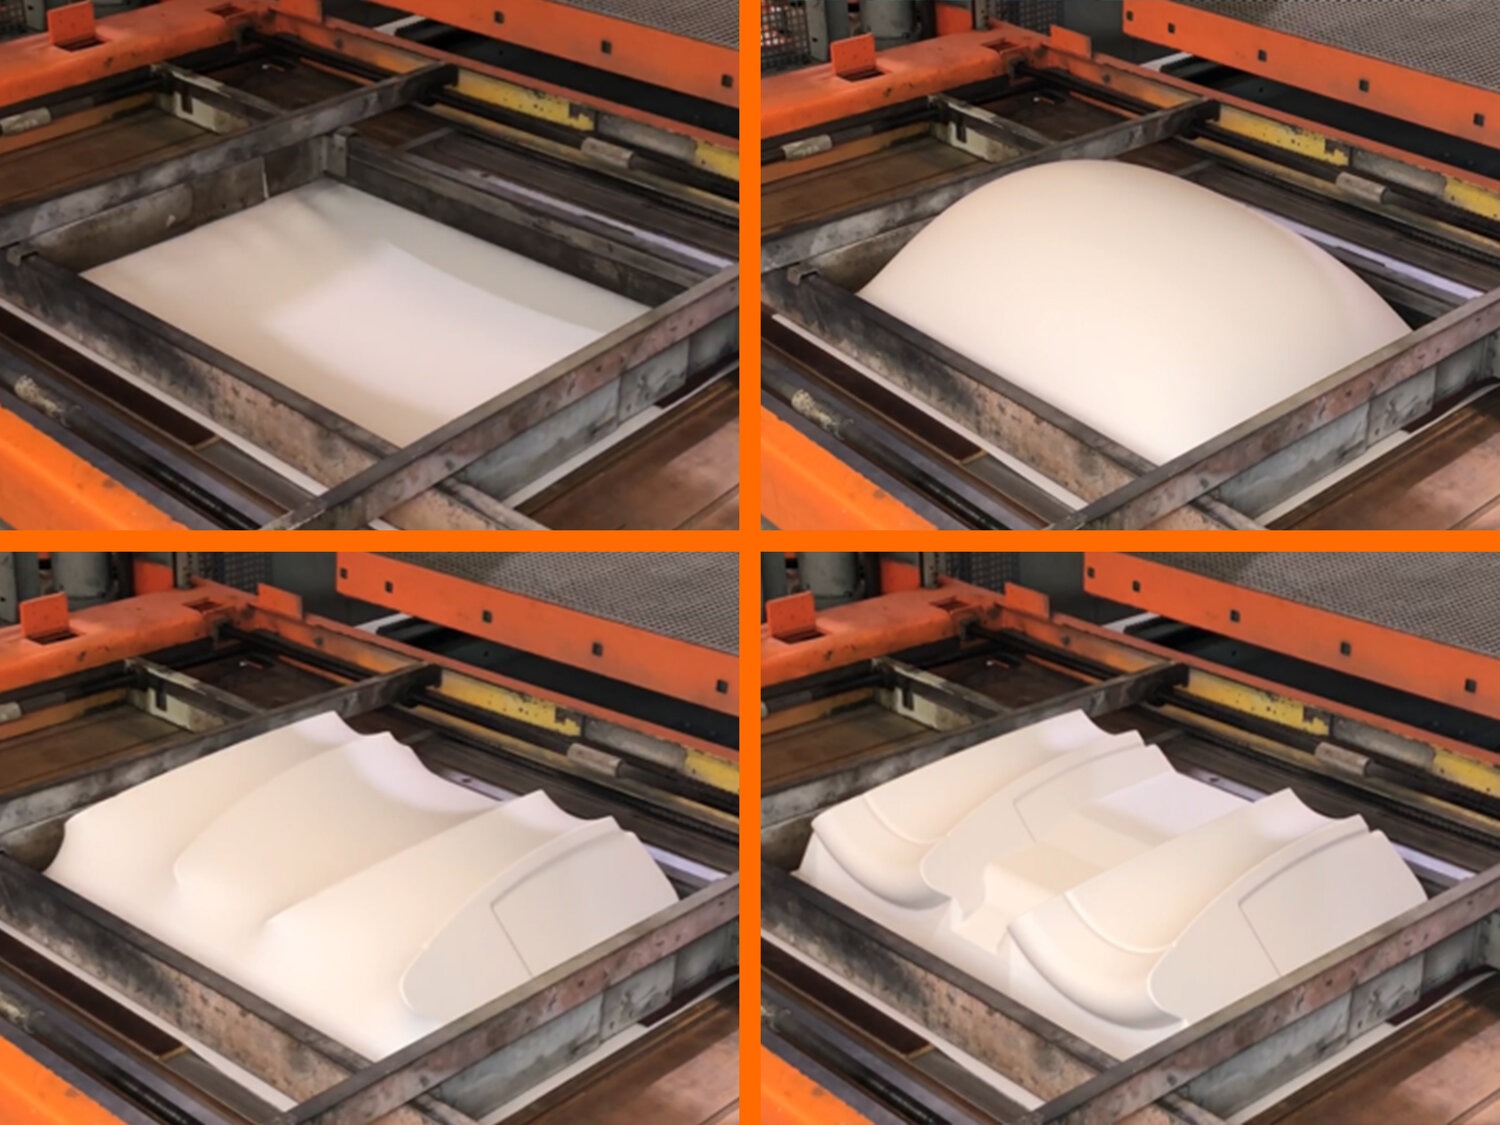
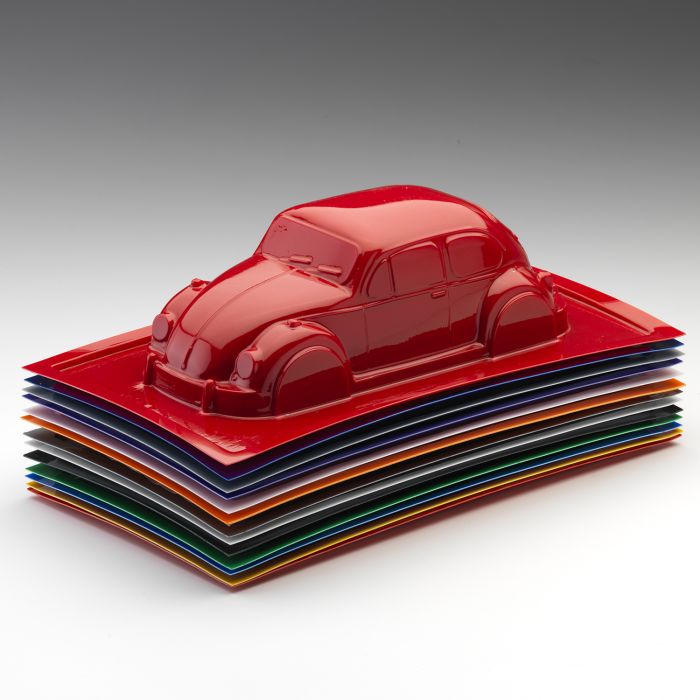
Forming the Shape
At this stage, the malleable plastic sheet, heated to its optimal temperature, is ready to take the shape of the mold. Precision and timing are of the essence to ensure the end product meets the desired specifications and quality.
Application of Vacuum
The vacuum is the heart of this process, as it’s responsible for pulling the heated plastic sheet onto the mold and ensuring it snugly fits every contour.
- Vacuum Strength: Typically, the vacuum pump used in the process has a power range of 1.5 kW to 5 kW. The strength required largely depends on the intricacy of the mold and the plastic’s thickness. For more detailed designs, a stronger vacuum might be necessary.
- Application Time: The time it takes to apply the vacuum and form the shape usually ranges between 20 seconds to 1 minute. This period is critical – too short, and the plastic might not form correctly, too long, and it might overstretch or cool down prematurely.
- Cost Efficiency: Modern vacuum pumps are designed for energy efficiency. However, operational costs can be a factor, with electricity expenses potentially reaching up to $10 per hour based on the pump’s power and local electricity rates.
Vacuum forming is favored for its speed and efficiency, especially when compared to other plastic molding techniques. But it’s imperative that the vacuum application is precise to achieve the desired product quality.
Ensuring Uniform Shaping
Uniform shaping ensures the end product’s structural integrity and aesthetic appeal. Here are some methods and considerations to ensure uniformity:
- Pre-stretching: Before applying the vacuum, some processes use a mechanical method to pre-stretch the plastic sheet. This ensures a more even thickness distribution, especially for deeper molds.
- Temperature Monitoring: Constantly monitor the plastic’s temperature. This is crucial as plastic that’s too hot can thin out during forming, while cooler plastic might not stretch adequately. Using infrared thermometers can help keep a close eye on the temperature, ensuring it stays within the optimal range.
- Mold Placement: The mold’s position relative to the plastic sheet can influence uniformity. Adjusting the height or angle might be necessary based on the mold’s design and the desired product’s specifications.
- Post-forming Checks: After forming, the plastic is allowed to cool and harden on the mold. Once removed, it’s essential to inspect the formed product for any inconsistencies or defects, measuring its thickness in various parts to ensure uniformity.

Cooling and Solidifying
After the heated plastic has been formed over the mold using the vacuum, the next crucial step is to cool and solidify it. The cooling process needs to be managed correctly to ensure the final product maintains its shape, has the right properties, and is free from defects.
Natural vs Forced Cooling
Natural Cooling:
- As the name suggests, natural cooling allows the plastic to cool at room temperature without any external aid. This is a slower method but ensures gradual and even cooling.
- The process doesn’t require any additional energy input, making it cost-effective in terms of operational expenses.
- The primary advantage of natural cooling is that it minimizes stresses within the plastic, ensuring a higher-quality finish. However, it might not be ideal for bulk production due to the longer cooling time.
Forced Cooling:
- This method uses external mechanisms like fans, water sprays, or cool air jets to accelerate the cooling process.
- While it speeds up production, it consumes additional energy. For instance, using industrial fans might consume around 0.5 kW to 1 kW of power, increasing costs by approximately $2 to $5 per hour based on local electricity rates.
- Forced cooling, if not managed correctly, can introduce stresses or warping in the plastic, impacting the final product’s quality.
Choosing between natural and forced cooling depends on the production goals, quality requirements, and budget constraints.
Factors Affecting Cooling Time
Several factors play a role in determining how quickly a molded plastic product cools:
- Thickness of the Plastic: Thicker sheets take longer to cool than thinner ones. For example, a 6mm sheet might take up to 20 minutes to cool naturally, while a 2mm sheet might only need 5 minutes.
- Type of Plastic Material: Different plastics have varied cooling rates. For instance, polycarbonate (PC) cools faster than polyethylene (PE).
- Ambient Temperature: The cooling rate can be influenced by the environment. On a hot day, the cooling time increases, whereas, in colder conditions, it might be reduced.
- Mold Material: Metals, being good conductors of heat, can draw away heat faster from the plastic, aiding in quicker cooling. In contrast, wood or resin molds might not be as efficient.
Trimming and Finishing
The final stage in vacuum forming is to refine and finalize the formed plastic piece. Even though the plastic has taken the shape of the mold, excess material often remains around the edges. Plus, the product may require additional refining to ensure its meets the intended quality and appearance standards.
Cutting Techniques
Trimming away the excess plastic is paramount to get the product to its final shape and size.
- Manual Trimming: This involves using hand tools like knives or scissors. While this method offers high precision, it’s time-consuming and labor-intensive. It’s best suited for prototypes or low-volume production.
- Die Cutting: This involves using a predefined mold or shape to cut the plastic. Die cutting machines can apply pressures up to 25 tons, ensuring a clean cut. However, setting up the die can cost between $500 to $5,000, based on its complexity.
- CNC Trimming: Using Computer Numerical Control (CNC) machines ensures high precision and repeatability. These machines can cost anywhere from $20,000 to $150,000 based on their capabilities. They offer high speed, with typical cutting speeds ranging from 50 to 2,500 mm/min.
Choosing the right cutting technique depends on the production volume, budget, and the precision required for the end product.
Surface Finishing and Quality Control
After trimming, the product often requires additional finishing to achieve the desired texture, appearance, or to add features.
- Sanding and Polishing: To achieve a smooth surface or to remove minor imperfections, the product can be sanded using varying grits, from 200 to 2000. Polishing compounds can then be applied to achieve a glossy finish. The cost of manual sanding and polishing can range from $10 to $50 per hour based on labor rates.
- Painting or Coating: Products might need painting for aesthetics or functional coatings for UV protection or resistance to chemicals. The price of painting can vary widely based on the paint type, with costs ranging from $5 to $100 per gallon.
- Quality Control Checks: Every product undergoes inspections to ensure it meets the desired specifications. Measurements are taken to check dimensions, and visual inspections ensure there are no defects. Advanced setups might use automated systems, like 3D scanners, that can quickly measure and compare the product to its intended design.