Yes, you can vacuum form plexiglass; it requires precise heating and molding to shape the durable, clear material.
The Basics of Plexiglass: Composition and Properties
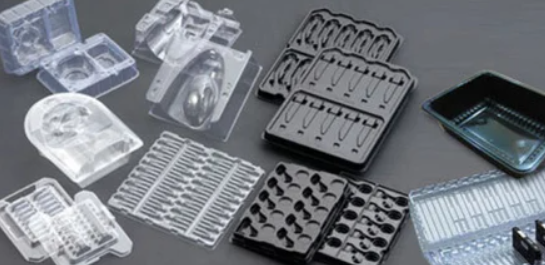
Plexiglass, commonly known by its chemical name polymethyl methacrylate (PMMA), stands out in the world of plastics due to its exceptional clarity and resistance to UV light and weathering. Manufacturers produce Plexiglass through polymerization of methyl methacrylate monomers, which involves initiating a reaction that leads to long chains of PMMA. This acrylic material finds its place in a multitude of applications, from aircraft windows to protective barriers, thanks to its glass-like qualities minus the brittleness and heavy weight.
Chemical Composition of Plexiglass
The molecular structure of Plexiglass centers around the repeating unit of PMMA. The process of creating Plexiglass begins with the monomer methyl methacrylate and a catalyst, typically an organic peroxide. Through a process known as bulk polymerization, these components combine under heat and pressure to form the rigid, transparent polymer known for its stability and ease of fabrication.
Physical and Mechanical Properties Relevant to Forming
Plexiglass boasts a tensile strength of 10,000 psi, showcasing its ability to withstand significant stress before breaking. Its melting point hovers around 160°C (320°F), which is a critical parameter when heating sheets for vacuum forming. The material’s thermal expansion coefficient is 7×10⁻⁵ /°C, which requires consideration during the forming process to accommodate size changes with temperature variations.
Preparing Plexiglass Sheets for Vacuum Forming
Preparing plexiglass sheets for vacuum forming is a critical step in ensuring a successful molding process. The preparation involves a series of actions that ensure the plexiglass is clean, free of imperfections, and cut to precise dimensions to fit the vacuum forming machine.
Cleaning and Storage of Plexiglass Sheets
- Handling: Always handle plexiglass sheets with clean gloves to prevent fingerprints and contaminants.
- Cleaning solution: Use a specialized acrylic cleaner or a mild soap solution with a soft, non-abrasive cloth to gently clean the sheets.
- Drying: Air dry or use a soft, lint-free cloth to prevent water spots.
- Storage: Store plexiglass sheets vertically with adequate support to prevent warping. Ensure the storage area is free of dust and away from direct sunlight to avoid material degradation.
- Protective film: Keep the protective film on the sheets until the moment of forming to protect the surface from scratches.
- Inspection: Conduct a thorough inspection for any defects or scratches before the forming process.
Cutting Plexiglass to Size for Forming
- Measurements: Measure the dimensions required for the vacuum forming machine, allowing a margin for trimming after the forming process.
- Cutting tools: Utilize a circular saw or jigsaw with a blade designed for cutting acrylics to achieve clean edges.
- Cutting speed: Maintain a cutting speed of approximately 3,450 rpm to prevent overheating and melting the plexiglass.
- Cooling: If necessary, use a coolant or air blast to keep the temperature down during cutting.
- Edge finishing: After cutting, smooth the edges with fine-grit sandpaper or a routing tool to remove any burrs or rough spots.
The Vacuum Forming Process: Step-by-Step Guide
Vacuum forming is a technique that transforms a flat sheet of plexiglass into a shaped object using heat and vacuum pressure. The process is popular due to its efficiency and the quality of the products it produces. Understanding each step in detail ensures a successful outcome.
Pre-heating the Plexiglass to the Appropriate Temperature
- Temperature setting: Heat the plexiglass sheet to around 160°C to 190°C, which is the optimal temperature range for forming.
- Heating system: Use a calibrated heating system to ensure uniform heat distribution across the sheet.
- Monitoring: Continuously monitor the sheet as it heats to prevent overheating, which can cause bubbles or warping.
- Heat time: The heating time varies depending on the thickness of the plexiglass; for instance, a 3mm thick sheet typically requires about 3 to 4 minutes.
- Infrared thermometers: Employ infrared thermometers to check the surface temperature of the sheet to ensure it reaches the required temperature evenly.
Applying Vacuum Pressure to Shape Plexiglass
- Mold positioning: Place the mold beneath the heated sheet carefully.
- Vacuum application: Activate the vacuum to draw air out from underneath the heated sheet, causing it to conform to the shape of the mold.
- Vacuum power: Ensure the vacuum pump is powerful enough to achieve a minimum of 27 inHg vacuum pressure for a firm and consistent application.
- Forming time: Hold the vacuum pressure until the plexiglass cools and solidifies, typically taking between 2 to 5 minutes depending on the size and complexity of the mold.
- Release and removal: Once the plexiglass has cooled and hardened, release the vacuum pressure and remove the newly formed part.
Temperature and Timing: Key Factors in Forming Plexiglass
Mastering the temperature and timing during the vacuum forming process is critical for achieving the desired quality in plexiglass products. Proper control of these factors helps in avoiding defects such as bubbles, warping, or incomplete forming.
Optimal Temperatures for Different Thicknesses
- Thin Sheets (up to 3mm): Heat to 160°C to ensure malleability without causing thermal degradation.
- Medium Sheets (4mm to 6mm): Increase the temperature to 170°C to accommodate the additional material volume.
- Thick Sheets (above 6mm): Require temperatures up to 180°C for proper forming due to their higher thermal mass.
Timing Considerations for Uniform Forming
- Heating Time: A general rule is approximately 1 minute per millimeter of thickness, ensuring the sheet reaches a uniform temperature throughout.
- Forming Time: After applying the vacuum, maintain pressure for a minimum of 30 seconds to 2 minutes, depending on the complexity of the mold and the thickness of the sheet.
- Cooling Time: Allow the formed plexiglass to cool under vacuum pressure for several minutes to ensure it retains its shape upon release.

Tools and Equipment Needed for Vacuum Forming Plexiglass
To effectively vacuum form plexiglass, equipping oneself with the right tools and equipment is essential. This ensures precision, quality, and safety throughout the manufacturing process.
Types of Vacuum Forming Machines
- Manual Vacuum Formers: Ideal for small-scale operations or educational purposes, offering simplicity and hands-on control.
- Semi-Automatic Machines: Suitable for medium-sized productions, these machines balance manual intervention with automated processes.
- Fully Automatic Formers: Best for high-volume manufacturing, featuring advanced control systems for efficiency and consistency.
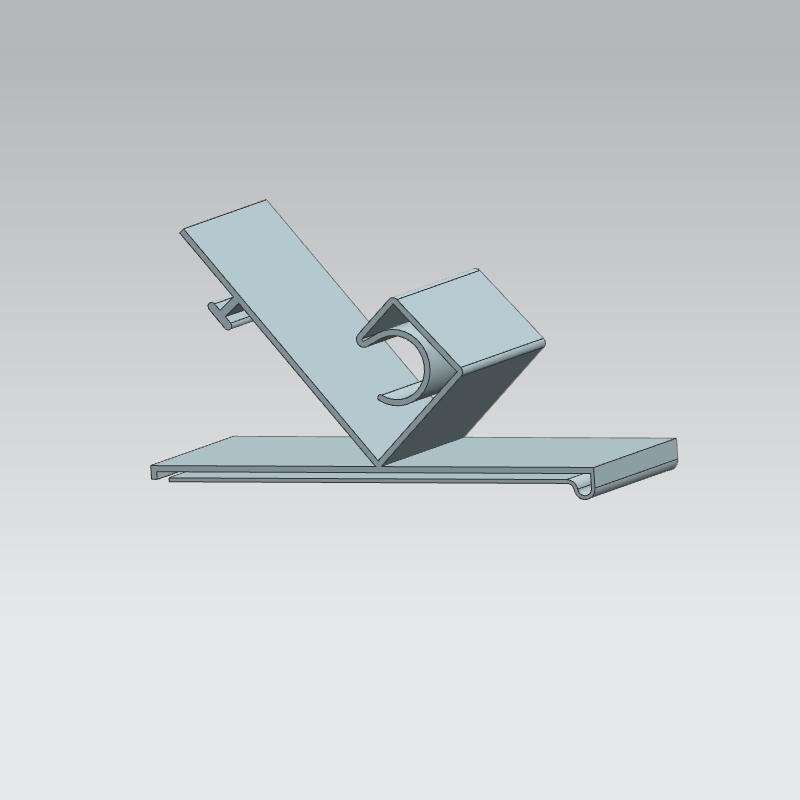
Custom Tooling and Molds for Plexiglass
- Wooden Molds: Cost-effective and quick to produce, suitable for prototyping or short runs.
- Aluminum Molds: Offer high durability and excellent heat conduction for consistent forming, ideal for long production cycles.
- 3D Printed Molds: Allow complex geometries and fine details, though they may require reinforcement for prolonged use.
Safety Measures When Working with Plexiglass and Vacuum Forming
Ensuring safety while working with plexiglass and vacuum forming machines is paramount to prevent accidents and health hazards.
Personal Protective Equipment (PPE)
- Safety Glasses: Protect eyes from flying debris during cutting or trimming.
- Heat-Resistant Gloves: Shield hands from high temperatures during the handling process.
- Respiratory Masks: Essential when sanding plexiglass to avoid inhaling dust particles.
Ventilation and Handling Safety
- Extraction Systems: Use to remove fumes and dust, keeping the air quality safe.
- Material Handling: Train staff on proper lifting techniques to handle larger sheets safely.
- Machine Guards: Install on cutting equipment to prevent accidental contact with moving parts.
Advanced Techniques and Tips for Professional Vacuum Forming
Professional vacuum forming requires mastery of advanced techniques and methods to produce complex and detailed shapes with precision. Utilizing advanced tips can significantly enhance the quality of the final product.
Using Plug Assists for Detailed Forming
- Material Choice: Select plug assists made from materials like wood, aluminum, or syntactic foam for their specific properties that aid in detailed forming.
- Design Precision: Design plugs that match the interior dimensions of the mold closely to ensure the plexiglass is pushed into all the details of the mold.
- Temperature Management: Preheat the plug assists to prevent the plexiglass from cooling prematurely, which can affect the detail transfer.
Multi-stage Forming for Complex Shapes
- Sequential Molding: Break down the forming process into multiple stages to gradually shape the plexiglass, allowing for complex geometries.
- Temperature Control: Carefully control the temperature between stages to maintain the plasticity of the plexiglass.
- Pressure Adjustments: Modify vacuum pressure in each stage to prevent tearing or overstretching of the material.
Case Studies: Successful Projects Using Vacuum Formed Plexiglass
Exploring successful projects that utilized vacuum formed plexiglass can provide valuable insights into the material’s versatility and the innovative ways it can be used across various industries.
Industry-specific Applications
- Automotive: Custom car components such as light covers and dashboards that require a clear, durable material.
- Aerospace: Cockpit canopies and cabin windows that must withstand extreme conditions while providing clarity and lightness.
- Medical Devices: Sterile, transparent covers and enclosures for medical equipment where hygiene and visibility are crucial.
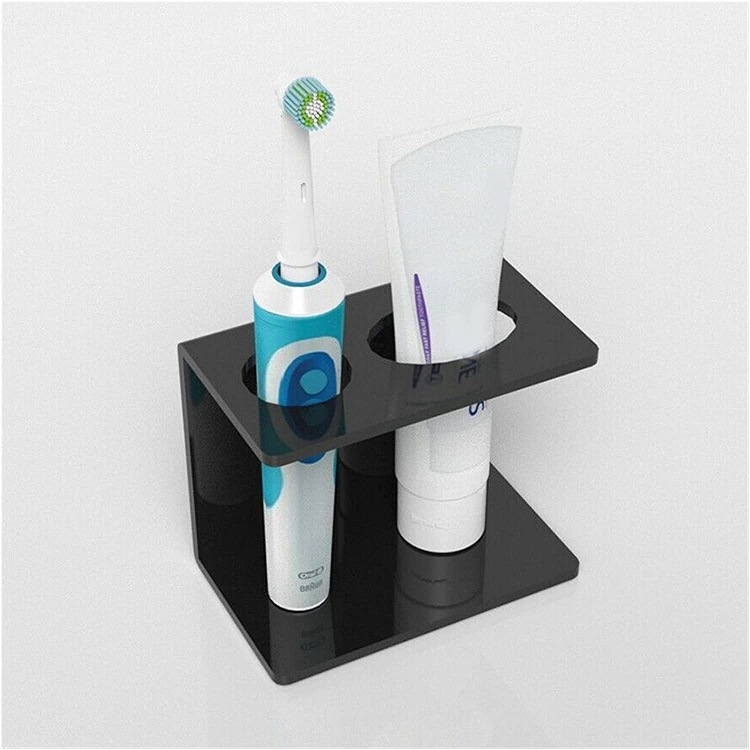
- Retail Displays: Attractive, durable display cases that highlight merchandise while protecting it.
Innovative Design Examples
- Architectural Features: Using vacuum formed plexiglass for creating intricate lighting fixtures and translucent architectural elements that combine aesthetics with functionality.
- Interactive Exhibits: Crafting engaging, durable interactive displays for museums and educational settings.
- Consumer Electronics: Prototyping and manufacturing clear, strong components for consumer electronics, showcasing the internal components while protecting them.
- Art Installations: Artists employing vacuum formed plexiglass to create stunning, light-interactive sculptures.