Yes, you can vacuum form over a 3D print, using the print as a mold for creating detailed, customized thermoplastic parts.
Preparation for Vacuum Forming over 3D Prints
Vacuum forming over 3D prints is a technique that combines the versatility of 3D printing with the efficiency of vacuum forming. This process allows for the creation of detailed, customized molds or parts. The key to success lies in meticulous preparation, which involves selecting appropriate materials, considering design aspects, and executing pre-processing steps for 3D prints.
Selecting Suitable Materials for 3D Printing
Choosing the right material for 3D printing is crucial for vacuum forming. The material must withstand the vacuum forming process without deforming. Common materials include ABS (Acrylonitrile Butadiene Styrene) and PLA (Polylactic Acid). PLA, while easier to print with, may deform under high temperatures. The cost of ABS and PLA varies, with ABS generally being more expensive due to its superior properties. The price per kilogram of ABS can range from $20 to $50, while PLA ranges from $15 to $35.
Design Considerations for Vacuum Forming
Designing for vacuum forming involves understanding the limitations and capabilities of both 3D printing and vacuum forming. The key parameters to consider include wall thickness, undercuts, and draft angles. The optimal wall thickness for vacuum forming is typically between 1.5 to 3 mm. This thickness ensures enough rigidity while allowing the plastic to form properly.
Pre-Processing Steps for 3D Prints
Pre-processing of 3D prints is essential for achieving quality results in vacuum forming. This includes surface smoothing and applying a release agent. This step enhances the quality of the final product by eliminating print layers and imperfections.
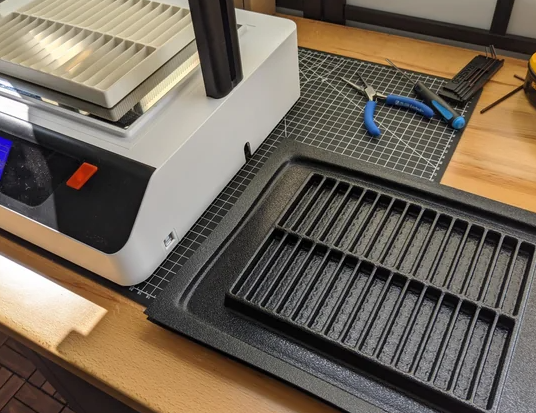
The Vacuum Forming Process on 3D Printed Objects
Vacuum forming on 3D printed objects merges the precision of 3D printing with the efficiency of vacuum forming, offering unique opportunities in manufacturing and prototyping. This process involves heating a plastic sheet and using a vacuum to form it over a 3D printed mold. Achieving success requires a thorough understanding of each step, along with knowledge to troubleshoot and optimize results.
Step-by-Step Guide to Vacuum Forming on 3D Prints
- Selecting the Plastic Sheet: Choose a sheet compatible with the mold material. The thickness can range from 0.5mm to 6mm, depending on the required strength and flexibility.
- Heating the Plastic Sheet: Use a vacuum forming machine to heat the sheet. The ideal temperature varies based on the material but typically ranges between 160°C to 320°C.
- Forming the Plastic Over the Mold: Once the sheet reaches the correct temperature, quickly transfer it over the mold and activate the vacuum. Ensure even pressure distribution for a uniform form.
- Cooling and Removing: Allow the formed plastic to cool and solidify before carefully removing it from the mold.
Troubleshooting Common Issues
- Wrinkles or Webbing: Caused by uneven heating or insufficient vacuum pressure. Ensure uniform heating and check the vacuum seal.
- Thin Spots: Occur due to too much stretching. Adjust the heating time or temperature to avoid overheating the plastic.
- Mold Sticking: Can happen if the release agent is not applied or the plastic is too hot. Use a suitable release agent and monitor the plastic’s temperature.
Achieving Optimal Results
- Optimize Mold Design: Include draft angles and avoid undercuts for easy release.
- Monitor Temperature Precisely: Use a thermometer or infrared sensor to ensure the plastic is heated to the ideal temperature range.
- Experiment with Materials: Each plastic type has unique properties. Experimenting with different materials can lead to better quality and cost efficiency. For example, PETG offers clarity and strength, whereas HIPS is more cost-effective.
Quality and Durability Considerations
The integration of vacuum forming with 3D printing brings unique challenges and opportunities in terms of quality and durability. Understanding and optimizing these aspects are crucial for creating parts that are not only aesthetically pleasing but also functionally robust and long-lasting.
Assessing the Strength and Durability of Vacuum Formed 3D Prints
- Material Selection: The choice of material significantly impacts the strength and durability. For instance, ABS offers higher temperature resistance and impact strength compared to PLA.
- Wall Thickness: Optimal wall thickness is crucial. Thicker walls (around 2-4mm) provide better strength but may reduce detail.
- Stress Analysis: Performing stress tests on the 3D printed mold and the vacuum-formed part can predict how they will perform under load.
Long-term Performance and Maintenance
- Environmental Factors: Consideration of environmental factors such as UV exposure, temperature fluctuations, and chemical exposure is essential. For outdoor applications, UV-resistant materials like ASA may be preferable.
- Regular Inspections: Scheduled inspections for cracks, warping, or other deformities can preemptively identify issues.
- Maintenance Practices: Proper cleaning and storage practices extend the life of vacuum-formed parts.
Enhancing Quality through Techniques and Materials
- Precision in 3D Printing: High-resolution 3D printing results in better mold quality, which in turn enhances the quality of the vacuum-formed part.
- Advanced Materials: Using advanced materials like PETG for its clarity and impact resistance, or polycarbonate for its extreme durability, can enhance the final product quality.
- Optimized Design: Incorporating features like ribs or gussets in the design can improve the structural integrity of the vacuum-formed part.
Comparative Table of Materials
| Material | Cost per Kg | Temperature Resistance | Impact Strength | UV Resistance | Applications |
|---|---|---|---|---|---|
| ABS | $20 – $50 | High | High | Moderate | Automotive, Industrial |
| PLA | $15 – $35 | Moderate | Moderate | Low | Prototyping, Decor |
| PETG | $25 – $45 | High | High | High | Medical, Food Safe |
| Polycarbonate | $30 – $60 | Very High | Very High | High | Safety Equipment |
Applications and Examples
Vacuum forming on 3D printed objects is a rapidly evolving field, showcasing versatility across various industries and inspiring innovative projects. This technique is paving the way for new applications and setting trends for future use.
Industrial Applications of Vacuum Forming on 3D Prints
- Automotive Industry: Custom interior components, such as dashboards and door panels, are produced using this method. It allows for rapid prototyping and customization with reduced costs.
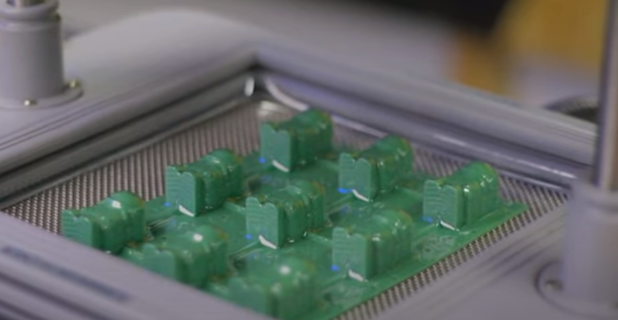
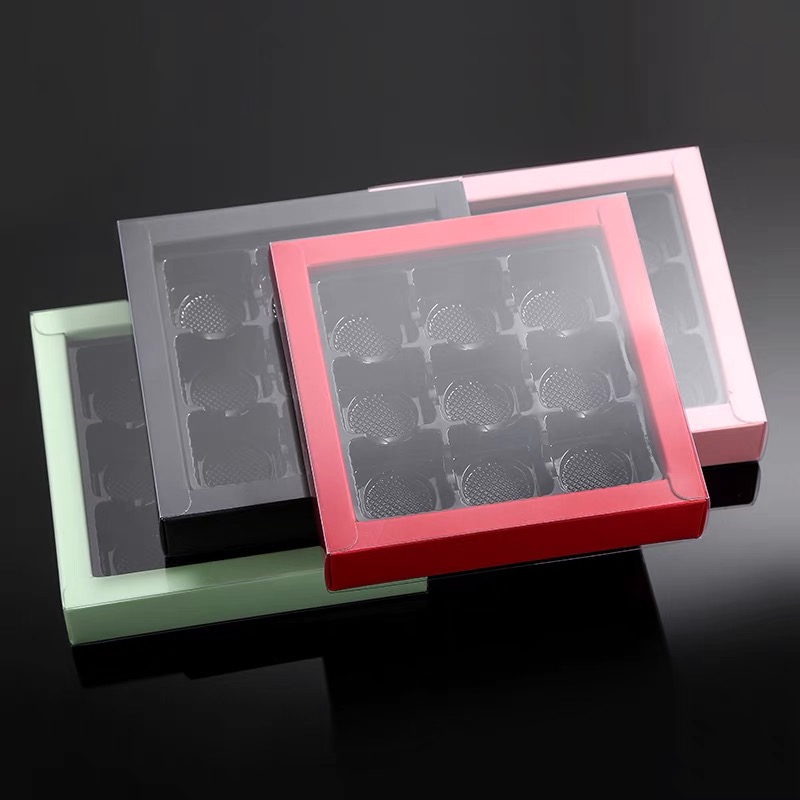
- Packaging Design: Vacuum forming is used to create bespoke packaging for electronics, cosmetics, and other consumer goods. 3D printing allows for intricate and customized mold designs.
- Medical Equipment: It’s applied in making lightweight, custom-fitted devices like orthotic braces and prosthetic covers, where patient-specific customization is key.
Innovative Projects and Case Studies
- Aerospace Components: Lightweight and strong components for drones and small aircraft have been developed using vacuum forming over 3D prints.
- Architectural Models: Detailed scale models of buildings and landscapes are produced for architectural presentations and studies.
- Art Installations: Artists have utilized this technique to create complex, large-scale sculptures and installations, demonstrating the creative potential of combining these technologies.
Future Trends in Combined Use
- Sustainability: There is a growing trend towards using biodegradable and recycled materials in both 3D printing and vacuum forming, addressing environmental concerns.
- Automation and AI Integration: The integration of AI in design and manufacturing processes is anticipated, allowing for more complex and optimized designs with minimal human intervention.